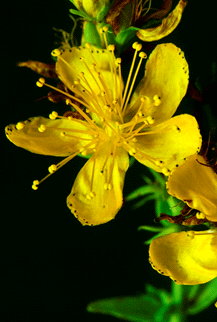
Dandelion Flower Syrup
fresh-picked dandelion flowers
water
granulated or superfine sugar
(Approximate amounts are given below. You can adjust recipe, as long as you keep a 1:1 ratio of sugar to water.)
Pick dandelion flowers, making sure not to get them from roadsides or areas that have been sprayed with pesticides. A medium bowl of flowers will yield about 2 cups (473 mL) syrup. If you want to pick more flowers, have some help for the next part-- it's labour intensive! Once picked, you might want to spread the flowers on paper or a towel (in the shade) for about 15 minutes to give any insects a chance to leave (although I've never encountered many on the flowers I've picked).
Next, you'll need to separate the petals from any leafy bits. Twisting the bulbous part of the stem at the base of the flowers helps detach the petals; after that, pick out any leaves. Leaves will make your syrup bitter, so make sure to remove all of them. Warning: your fingers and nails will get stained, but it should wash off (the nail staining might last a day or two).
A medium bowl of flowers yields a small bowl of petals, somewhat densely packed (about 1 to 1 1/4 cups or 250 to 300 mL). At this point, if you want, you can put the petals in the fridge for 1 to 3 days before proceeding with the syrup.
When you're ready to make the syrup, rinse the petals, then place half in a med-small pot (you don't want a pot that's too large, but you do want to leave room for the syrup to boil and expand). Cover the flowers in about 2 cups (473 mL) of water, and bring to a simmer, covered. Simmer for 7 to 10 minutes. Use a sieve to strain petals from the liquid, and return liquid to the pot. Press drained petals with the back of a spoon to squeeze out any remaining liquid, then discard them. Repeat process with the other half of the petals, putting them back in the reserved liquid.
Once the petals have all been removed from the liquid, add sugar. Boil uncovered on low heat until you get a syrupy consistency, 15 to 20 minutes after the sugar has dissolved. Watch carefully to prevent burning.
After the syrup has been removed from heat, allow to cool. If the syrup is too thin after it cools, you can boil it again (uncovered) for another 10 minutes, or until it thickens (you may also need to add a bit more sugar). Once you have the desired consistency, pour into sterilized jars or bottles. Keep refrigerated or in the freezer (freezing helps prevent crystallization).
Syrup tastes like honey. Use over fruit, pancakes, waffles, cereal, oatmeal, ice cream, desserts, in tea, and anywhere else you'd like.
Makes about 2 cups (473 mL)
 |
| Petals, leaves removed |
 |
| Petals, covered in water in a pot |
 |
The liquid after boiling the petals. The cloudiness disappears once it's boiled with sugar.  The syrup beginning to boil. The foam around the edges was gone by the time my syrup was done, but if any remains, you can skim it off and discard it.  As syrup boils, it expands. Watch carefully so it doesn't boil over!
 
|
If you want to read about a vampire that gets creative with herbs, check out my books!

(Links take you to all available stores. Love Lies Bleeding and Bleeding Heart are also available in paperback.)
Cheers,
Aspasia
PS: Follow me on my official site: AspasiaSBissas.com.
All photos by Whimsy Bower/Aspasia S. Bissas